Chef Emma here, and I’m about to share the cookie recipe that turned me into the coolest mom at the birthday party!
When my son asked for Pokémon sugar cookies for his class party, I knew I wanted to make something special but not impossible. I’m not a professional baker, and I definitely don’t have hours to spend on elaborate decorating. But I discovered that with a solid sugar cookie recipe and some simple decorating techniques, you can create adorable Pokémon cookies that look impressive without the stress.
The first time I made these, I was honestly nervous. Would the cookies hold their shape? Would my decorating attempts look like actual Pokémon characters? But as I pulled the first batch of golden, perfectly round cookies from the oven and started piping the royal icing, I realized how fun and forgiving this process is.
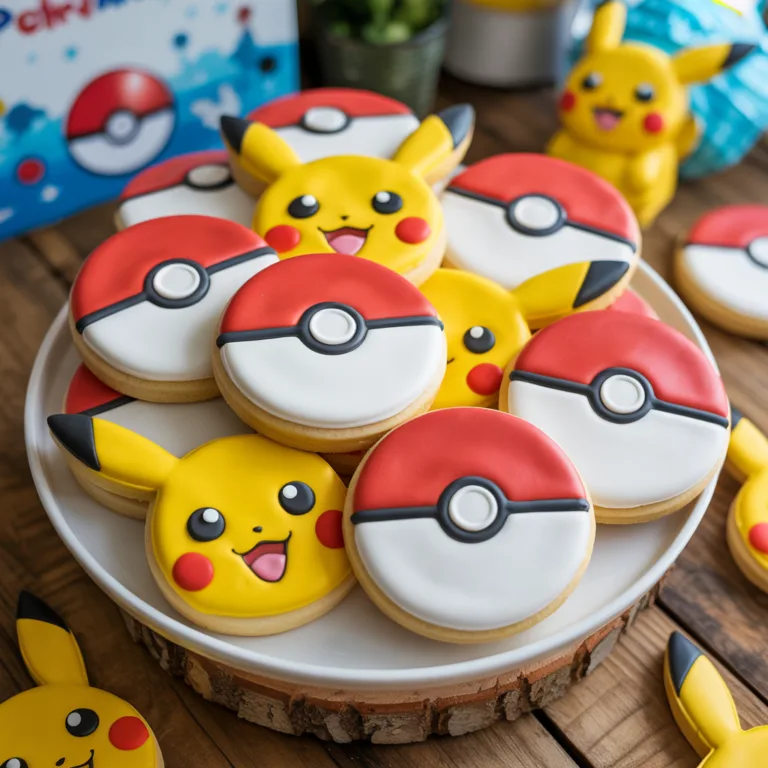
My favorite part was watching my kids’ eyes light up when they saw the finished cookies. The bright red and white Poké Balls, the cheerful yellow Pikachu faces—each cookie brought squeals of excitement. And when I brought them to the party, kids and parents alike couldn’t believe I made them myself.
What makes these Pokémon cookies so brilliant is how customizable they are. You can make simple Poké Ball designs that even beginners can master, or challenge yourself with character cookies like Pikachu, Charmander, or Squirtle. The same basic cookie dough and icing technique works for any design you choose.
These cookies are perfect for birthday parties, bake sales, class treats, or just a fun weekend baking project with the kids. They’re soft, buttery, and delicious—the kind of sugar cookie that melts in your mouth. And the decorating process is actually therapeutic and fun once you get the hang of it.
For more creative cookie inspiration, check out Midwestern Moms’ collection of decorated cookies, or explore Ashlee Marie’s guide to character cookie decorating that makes professional results accessible to everyone.
Table of Contents
Summary
These Pokémon Sugar Cookies are soft, buttery, and perfect for decorating with simple royal icing designs.
Create adorable Poké Balls, Pikachu faces, or your favorite Pokémon characters using basic decorating techniques. Great for parties, bake sales, or weekend fun with the kids!
Prep Time: 30 minutes (plus 2 hours chilling)
Cook Time: 10 minutes per batch
Decorating Time: 45-60 minutes
Total Time: 3 hours 30 minutes
Servings: 24-30 cookies
Difficulty: Intermediate (decorating) but beginner-friendly cookies
Pokémon Sugar Cookies (Soft, Simple, and Cute)
Ingredients
Equipment
Method
- In large bowl with electric mixer, cream butter and sugar until fluffy (3 minutes). Add beaten eggs, mix until smooth.
- Mix sour cream and baking soda in small bowl (will foam). Add to butter mixture with vanilla. Mix until combined.
- In separate bowl, sift together flour, baking powder, and salt.
- Gradually add flour mixture to wet ingredients, 1 cup at a time, mixing on low just until combined. Don’t overmix.
- Divide dough in two, wrap in plastic, refrigerate at least 2 hours or overnight.
- Preheat oven to 375°F. Line baking sheets with parchment. Remove one dough portion, keep other chilled.
- On well-floured surface, roll dough to ¼-inch thickness. Cut shapes with cookie cutters. Place 2 inches apart on sheets.
- Bake 8-10 minutes until edges barely golden. Don’t overbake! Cool on sheet 5 minutes, then transfer to wire racks. Cool completely.
- Make royal icing: Beat egg whites (or meringue powder mixture) until frothy. Add powdered sugar, cream of tartar, vanilla. Beat 7-10 minutes until stiff peaks form.
- Divide icing into bowls, add gel coloring. For outlining, keep thick. For flooding, thin with water ½ tsp at a time until honey consistency.
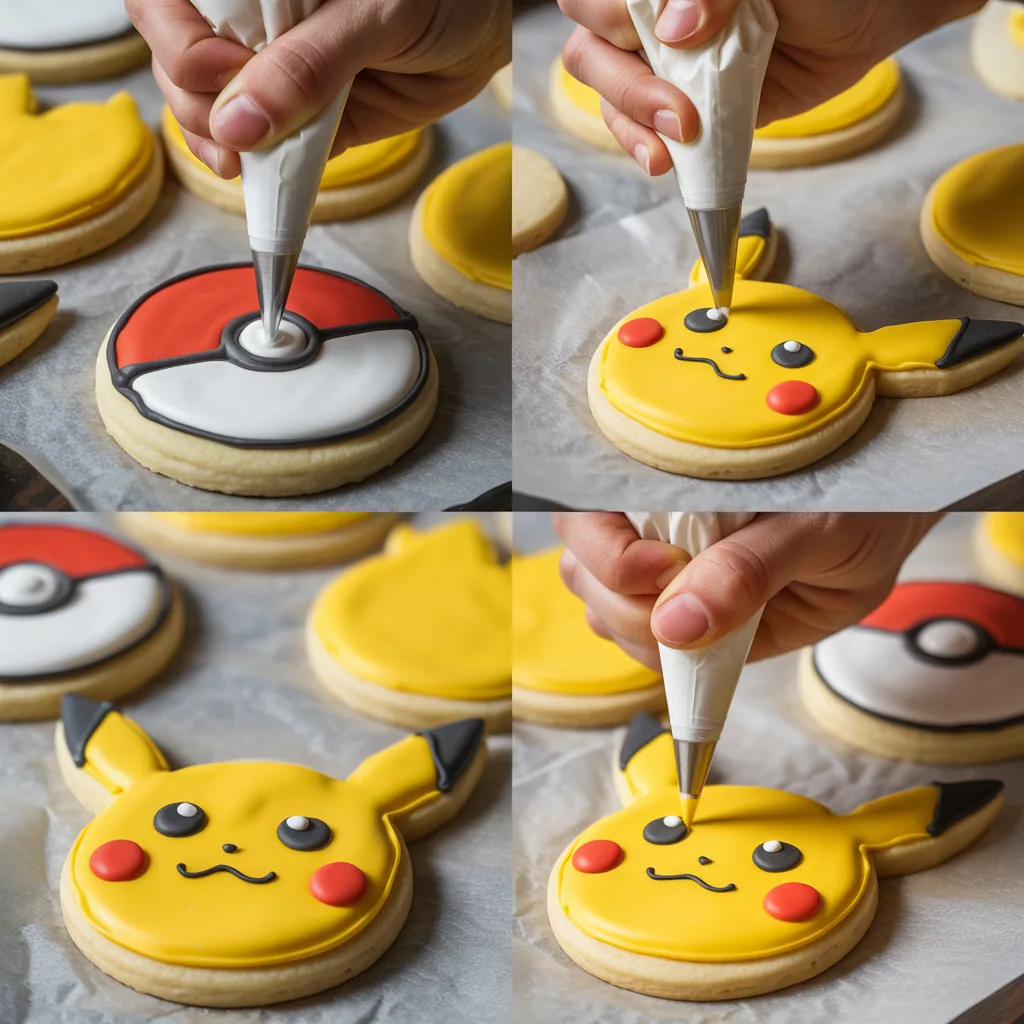
- Decorate: For Poké Balls, outline and flood top red, bottom white, add black center with white dot. For Pikachu, flood yellow, add black eyes, red cheeks, nose and mouth. Let each color dry 10-15 minutes before adding details.
- Let cookies dry completely (4+ hours, preferably overnight) before stacking or packaging.
Notes
Equipment For Pokémon Sugar Cookies
You’ll need these baking and decorating tools:
- Large mixing bowls – For cookie dough and icing
- Electric mixer – Stand mixer or hand mixer
- Rolling pin – For rolling dough
- Cookie cutters – Round cutters (3-inch), or Pokémon-shaped cutters
- Baking sheets – Two or three
- Parchment paper – For easy cleanup
- Piping bags – Disposable decorating bags
- Piping tips – Number 2 or 3 round tips
- Toothpicks or scribe tool – For spreading icing
- Small bowls – For dividing icing colors
- Wire cooling racks – Essential for cooling
Ingredients For Pokémon Sugar Cookies
For the Sugar Cookies
- 1 cup (2 sticks) unsalted butter, softened
- 2 cups granulated sugar
- 3 large eggs, well beaten
- 1 cup sour cream – Makes cookies extra soft
- 1 teaspoon vanilla extract
- 6 cups all-purpose flour – Plus more for rolling
- 1 teaspoon baking soda
- 1 teaspoon baking powder
- ½ teaspoon salt
For the Royal Icing
- 4 large egg whites – Or 3 tablespoons meringue powder + 6 tablespoons water
- 2 pounds (about 8 cups) powdered sugar – Sifted
- ½ teaspoon cream of tartar
- 1 teaspoon vanilla extract
- Gel food coloring – Yellow, red, black, blue, orange, green (depending on designs)
Optional Decorations
- Mini chocolate chips for eyes
- White M&Ms for Poké Ball centers
- Edible glitter or sparkles
- Colored sugar crystals
Directions For Pokémon Sugar Cookies
Step 1: Make Cookie Dough
In a large bowl with an electric mixer, cream softened butter and sugar together until light and fluffy (about 3 minutes).
Add beaten eggs and mix until well combined. The mixture should be smooth and pale yellow.
Step 2: Add Sour Cream and Vanilla
In a small bowl, mix the sour cream and baking soda together—this will foam slightly.
Add this mixture to the butter mixture along with vanilla extract. Mix until fully combined.
Step 3: Combine Dry Ingredients
In a separate bowl, sift together flour, baking powder, and salt.
This ensures even distribution and prevents lumps.
Step 4: Mix Dough
Gradually add the flour mixture to the wet ingredients, mixing on low speed.
Add flour about 1 cup at a time, mixing just until combined after each addition. Don’t overmix—the dough should just come together.
Step 5: Chill Dough
Divide dough into two portions, wrap tightly in plastic wrap, and refrigerate for at least 2 hours or overnight.
Chilled dough is essential for cookies that hold their shape and don’t spread excessively.
Step 6: Preheat and Prepare
Preheat oven to 375°F. Line baking sheets with parchment paper.
Remove one portion of dough from refrigerator at a time, keeping the other chilled.
Step 7: Roll and Cut
On a well-floured surface, roll dough to ¼-inch thickness.
Use cookie cutters to cut shapes—circles for Poké Balls and Pikachu faces, or character-shaped cutters. Place cookies 2 inches apart on prepared baking sheets.
Step 8: Bake
Bake for 8-10 minutes, just until edges barely start to turn golden.
Don’t overbake! Cookies should look slightly underdone in the center—they’ll continue cooking on the hot pan. They’ll be soft and perfect once cooled.
Step 9: Cool Completely
Remove from oven and let cool on baking sheet for 5 minutes.
Transfer to wire racks and cool completely before decorating—this is crucial! Warm cookies will melt the icing.
Step 10: Make Royal Icing
In a large bowl with electric mixer, beat egg whites (or meringue powder mixture) on medium speed until frothy.
Add sifted powdered sugar, cream of tartar, and vanilla. Beat on low speed for 7-10 minutes until stiff peaks form. The icing should be thick and glossy.
Step 11: Prepare Icing Colors
Divide icing into separate bowls for each color you need.
Add gel food coloring drop by drop, mixing until you achieve desired colors. For outlining, keep icing thick. For flooding (filling in), thin with water (½ teaspoon at a time) until it’s the consistency of thick syrup.
Step 12: Decorate Cookies
For Poké Balls: Outline and flood the top half red and bottom half white. Add a black circle in the middle with a white M&M or icing dot in the center. Add a black horizontal line separating red from white.
For Pikachu: Cover entire cookie with yellow icing. Let dry 15 minutes. Add black oval eyes, red cheek circles, small black nose, and W-shaped mouth with black icing.
For other characters: Follow reference images, working from background colors to details, letting each color dry before adding the next.
Step 13: Dry Completely
Let decorated cookies dry completely—at least 4 hours, preferably overnight.
Royal icing needs time to harden before stacking or packaging.
")
Tips and Variations For Pokémon Sugar Cookies
Chef Emma’s Pro Tips
- Chill the dough thoroughly: This is non-negotiable! Warm dough spreads and loses shape. If dough gets too soft while rolling, pop it back in the fridge.
- Don’t overbake: Sugar cookies should be barely golden at the edges and look slightly underdone. They firm up as they cool.
- Work with one color at a time: This prevents icing from drying out in the bags and makes the decorating process less overwhelming.
- Let icing layers dry: Don’t rush! Each color needs 10-15 minutes to set before adding details on top, or colors will bleed together.
- Use gel food coloring: Liquid coloring dilutes icing and creates pastel colors. Gel gives vibrant, true colors with just drops.
- Practice piping: Practice on parchment paper before piping on cookies. You’ll get the feel for pressure and flow.
Delicious Variations
- Chocolate Pokémon Cookies: Replace 1 cup flour with cocoa powder for chocolate cookies
- Lemon Sugar Cookies: Add 1 tablespoon lemon zest and replace vanilla with lemon extract
- Almond Flavored: Use almond extract instead of vanilla for a different flavor profile
- Gluten-Free Version: Use gluten-free 1:1 baking flour blend in place of regular flour
- Mini Cookies: Use smaller cutters for bite-sized treats—reduce baking time to 6-8 minutes
Serving Suggestions
These Pokémon cookies are perfect for:
- Birthday party favors—bag individually with ribbons
- Pokémon-themed birthday cakes (arrange around the base)
- School class treats
- Bake sale items—they always sell out!
- Game night snacks for Pokémon fans
- Care packages for college students
- After-school treats
- Weekend baking projects with kids
Storage Instructions
Room Temperature: Store decorated cookies in airtight containers with parchment paper between layers for up to 1 week. Royal icing keeps them fresh!
Refrigerator: Not recommended—refrigeration can cause icing to weep or become sticky.
Freezer: Freeze undecorated cookies for up to 3 months in airtight containers or bags. Thaw at room temperature and decorate as desired. Decorated cookies can also be frozen but colors may slightly fade.
Nutrition Facts
| Nutrient | Per Cookie (based on 30 cookies) |
|---|---|
| Calories | 215 |
| Protein | 3g |
| Total Fat | 7g |
| Saturated Fat | 4g |
| Carbohydrates | 37g |
| Fiber | 0g |
| Sugar | 25g |
| Sodium | 75mg |
| Cholesterol | 35mg |
Nutrition information is approximate and based on 30 cookies including royal icing decoration. Values may vary based on size and amount of icing used.
Nutritional Highlights
These sugar cookies are definitely a special treat! Perfect for celebrations, parties, and special occasions where a little indulgence is part of the fun.
The cookies provide energy from carbohydrates, which is great for active kids who need fuel for playing and running around. The eggs and butter provide some protein and essential fats.
While high in sugar, homemade cookies allow you to control the quality of ingredients—real butter, fresh eggs, and no preservatives or artificial flavors like store-bought cookies.
Dietitian Tips
- Portion control: These cookies are rich and satisfying—one or two is plenty for a sweet treat
- Reduce sugar: You can reduce the sugar in the cookie dough by ¼ cup without significantly affecting texture
- Add nutrition: Mix mini chocolate chips or finely chopped nuts into the dough for extra flavor and nutrition
- Pair wisely: Serve with milk or fresh fruit to add protein and nutrients to snack time
- Special occasion food: Remember, cookies are meant for celebration and enjoyment—don’t stress the nutrition, just enjoy mindfully
")
FAQs
Can I use store-bought cookie dough instead?
Yes! Refrigerated sugar cookie dough from the grocery store works in a pinch. Roll it out, cut shapes, and decorate. The texture won’t be quite as soft as homemade, but it’s a huge time-saver and still tastes great.
Do I have to use royal icing?
Royal icing is best for detailed decorating because it dries hard and maintains clean lines. However, you can use buttercream frosting for a softer, easier option—it just won’t be as precise or transportable.
Can I make the dough ahead?
Absolutely! Cookie dough can be made up to 3 days ahead and refrigerated, or frozen for up to 3 months. Thaw frozen dough overnight in the refrigerator before rolling.
Why did my cookies spread?
The dough wasn’t cold enough, you didn’t use enough flour when rolling, or the oven wasn’t fully preheated. Always chill dough thoroughly and work quickly so it doesn’t warm up.
How do I get smooth icing?
The key is consistency! For flooding, icing should be the thickness of honey—when you drizzle it, it should smooth itself within 10 seconds. Use a scribe tool or toothpick to spread icing into corners.
Can kids help decorate?
Yes! While precise details require practice, kids can absolutely help with basic flooding and adding sprinkles. Give them simpler designs like Poké Balls while you tackle character faces.
Conclusion For Pokémon Sugar Cookies
These Pokémon Sugar Cookies prove that impressive, adorable decorated cookies are totally achievable at home without professional training.
With soft, buttery cookies and simple royal icing techniques, you can create treats that look bakery-quality and taste even better. Whether you’re making them for a party, a bake sale, or just for fun, these cookies deliver smiles every single time.
What I love most about this recipe is how it brings joy to everyone involved. The kids love the Pokémon theme, I love how beautiful they turn out, and everyone loves eating them! It’s become one of our favorite weekend activities—we roll out the dough, cut the shapes together, and spend an afternoon decorating while chatting and laughing.
These decorated Pokémon cookies have become my go-to for any occasion that needs a special treat. They’re surprisingly approachable once you understand the basic techniques, and each batch you make will be better than the last as you develop your skills.
I encourage you to start with simple designs like Poké Balls until you get comfortable with the icing consistency and piping technique. Then branch out to character faces and more complex designs. The great thing about cookies is that even “imperfect” ones taste delicious!
So grab your mixing bowls, choose your favorite Pokémon characters, and get ready to create the cutest cookies that will make you the hero of any party. These cookies are ready to be caught—I mean baked!
Blog and Social Links Footer
For more recipes: famillyrecipes.com
Follow me on Facebook and Pinterest